Showing posts with label beadorigami. Show all posts

Thursday, September 16, 2010

Tutorial Thursday: Scooplets


Thanks to BeadOrigami's awesome Bubble Beaded Beads tutorial, I've been on a beaded bead roll these past few months! After a few bubble beads and variations thereof, I moved on to a basic embellished 'plum blossom' design, adapting the widely-used pattern with strategic bead placement/substitution, and a lot of experimentation. I now have a heap of them, and call them Scooplets, because they look just like tiny scoops of ice cream! I wear them individually on a simple cord or silk ribbon, or incorporate them into jewelry, as in my black and gold Final Mystery necklace.You can get tutorials on the Bubble Beaded Bead from BeadOrigami, 1BeadWeaveror a number of the sources linked above.


Each of these beads is the exact same basic pattern, varying only in the type of beads selected, and the amount/placement of embellishment. For example, in the gold and black necklace, I stitched the bead in the basic pattern, in 3mm beads, embellishing each hole except on each end.

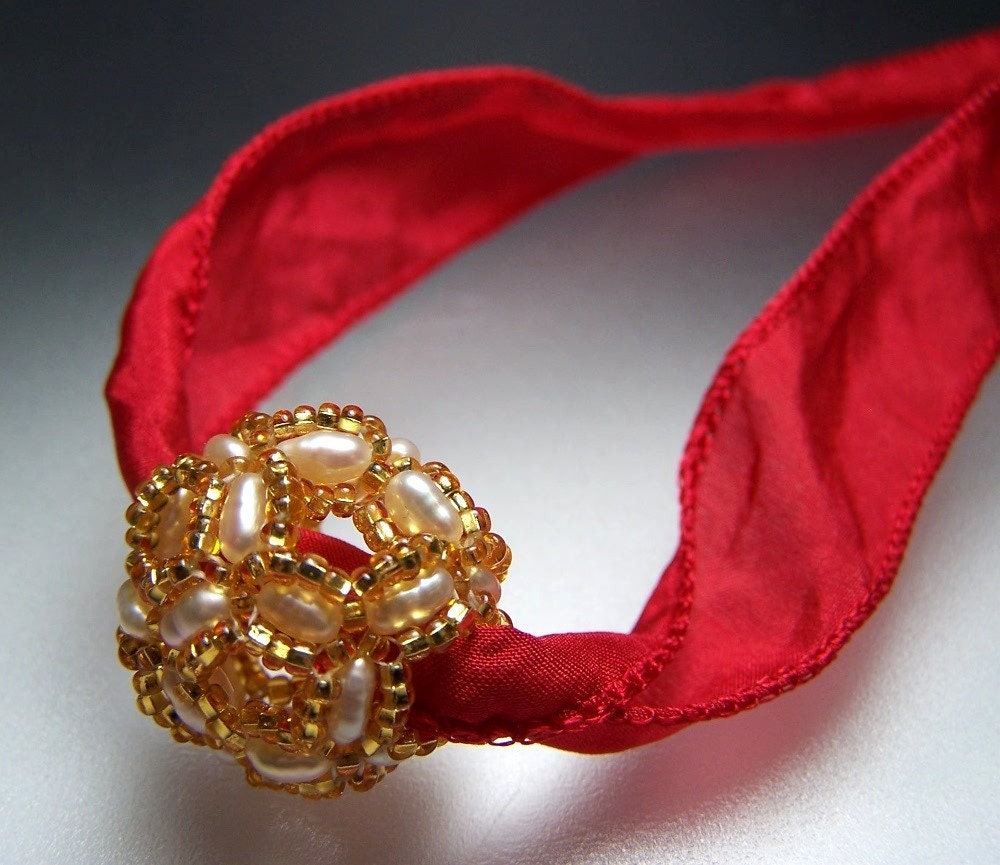
The second pearl, gold and red necklace, I used pearls and increased the gold bead count to accomodate the longer pearls.

Continuing down clockwise, I used 3mm beads and long teardrops in the orange bead.

The aqua bubbly bead used 4mm beads and fringe seed beads, plus some silver 11/o embellishments.

The next bead uses 6x4mm crystal rondelles in the main body, and 4mm firepolish at each end. A silk ribbon was strung with a teardrop dangle, then both ribbon ends were strung through the scooplet, hanging the scooplet vertically.

The last bead uses 4mm and 3mm beads, the 4mm beads used along the 'equator' of the bead, creating a saucer shape, rather than a round.

Thursday, July 22, 2010

They just keep coming!

After the darn learning experience which resulted in the gratifying 'Disco Lemonade' necklace, I've gotten very enthusiastic about the dodecahedron beaded bead! It's a LOT easier to make when using beads that have a hole through the center, as opposed to through the top like the teardrops. Far easier to keep track of where you are in the beadwork, how many stitches are left, etc.
Usually when I get all enthusiastic about a beading idea, I make perhaps two more of a similar type, then end up making some other piece in my queue of ideas. But after that first bead, I immediately started the next, this time substituting roundish 4mm orange/pink faceted glass in place of the teardrops, with orange, pink and lavender embellishment beads, stringing the finished bead onto a simpler necklace of lemon-drop glass beads. I still used a core bead. Feeling fantastical, I named it 'Citrus Lips'.


Then I began to stray farther from the pre-designed pattern, fortifying and accenting the many holes in the beaded bead, eliminating the need for a core bead, and strategically using colours to play up the shape of the bead. The first one was in glossy and matte black, accented with hot pink.


The second time I made this type of bead, I used transparent faceted orange glass, accented by clear citron yellow to open up the feel of the bead. I call this my 'Hot Citrus' bead, and it reminds me of all that CSI: Miami I used to watch--the overall quality of the show may be questionable, but it was undeniably one of the top three most beautiful shows on television.


In the third bead, entitled 'Hot Raspberry', I used sparkly black beads and the same hot pink as in the first bead, eliminating the matte black and resulting in a mostly-pink bead with hints of black peeking out.


I left the glass behind for some shiny hematite rounds in the latest iteration of this design. Hematite looks a bit like black silver, or iron cleaned up and decked out for the prom, so I paired it with matte black and shiny silver accenting the holes. It makes me think of supervillains in their ominous but oh-so-cool supersuits which must ALWAYS have something glowing. The finished bead looks like black, but the hematite bridges the gap between the shiny silver and the dark black, giving it a hint of sophistication.

Friday, July 16, 2010

Disco Lemonade: Another Learning Experience

Etsy's BeadOrigami designs such neat beaded beads, I had to try one of her tutorials for myself. Her descriptions suggest doing the Bubble Jacks bead first, but I thought, this Bubble Beaded Bead is at my beading level, it'll be easy to do once I glance at the graphics (which is how I usually learn), right?

 WRONG! It took me three tries, meticulously following the instructions, step by step. But I was determined to finish that bead, and, paying close attention to the super-detailed instructions, I finally understood, and finished my bead! Thank you beadorigami, for all the labour you must have put into that tutorial; without those truly step-by-step instructions and graphics, I would NEVER have been able to do this!

After starting the project, I realized the teardrops I had were one size up from the recommended size; I had 8x5 drops instead of 6x4s. But I was determined to make them work, and they did! I had to bead the thing over a 12mm vintage crystal core bead though. I chose matte scarlet seed beads (blending in with the glossy drops), matte orange beads, clear pink-lined beads, and bright fuschia 15/o's.

I left out the second colour of 15/o's, as I had no suitable colour. You can't reallly see the orange, as it's close to the base, but it gives off just a little glint.
I strung the finished bead on a headpin with a lone pair of hot pink firepolished faceted beads sitting in my glass drawer for ages, then used it as a centerpiece amongst my remaining glass drops, pink-lined seed beads and chalcedony briolettes from the Bead & Button show, finishing off the whole necklace with vibrant pink silk and a hammered wire clasp.